
By High End Construction — Exterior Renovation & Stucco Specialists, Calgary
If you’ve searched for information about replacing windows on a stucco home, you’ve probably found a lot of general window guides that treat every home the same. They cover glass packages, frame materials, and energy ratings — but skip over the part that actually determines whether your project succeeds or fails: what happens to the stucco, flashing, and wall system around the window.
This guide is written from the contractor side, based on hands-on experience with stucco homes in Calgary and the surrounding area. Our focus is the exterior envelope — the full system of materials that protects your home from weather, moisture, and the freeze-thaw punishment that Calgary winters deliver year after year.
Why Stucco Homes Are Different
On a standard wood-siding or vinyl-sided home, window replacement is relatively straightforward. On a stucco home, the window is part of a layered wall system. Around every window opening, several components have to work together:
- The exterior stucco finish
- The moisture barrier behind the stucco
- Flashing at the window head, sill, and jambs
- Sealants at the transition between window frame and stucco
- Insulation around the rough opening
- The trim or stucco return that finishes the edge
Every one of those layers needs to be properly addressed when a window is replaced. If even one element is handled poorly, water can find its way behind the wall — and on a stucco home, that damage is often invisible until it becomes expensive.
This is especially true in Calgary, where stucco homes face some of the most demanding exterior conditions in Canada. Our stucco repair work in Calgary regularly involves correcting problems that started at poorly replaced windows — which is why we treat every window replacement as an exterior envelope job, not just a window job.
The window is not a separate product sitting in an opening. It is part of the wall.
The Most Common Mistake — And What It Costs
The most common mistake we see on stucco homes is treating window replacement like a simple “remove and replace” job. Less experienced contractors sometimes cut out the old window, install the new one, run a bead of caulking around the edge, and consider the job done. But that’s usually where the problems begin.
Caulking alone is not a water management system.
When the stucco edge, flashing, and moisture-barrier tie-in are not properly handled, water can work its way behind the wall assembly. Over time, that leads to:
- Cracking and staining around the window
- Rot in the surrounding framing
- Failed insulation
- Interior leaks, mold concerns, and drywall damage
- Damaged stucco that needs to be opened up and rebuilt
What started as a window replacement becomes a wall repair. The homeowner pays once for the shortcut job, then pays again — often significantly more — to fix what was missed. You can see examples of this type of corrective work in our project portfolio.
The cheapest window replacement can become the most expensive one if the wall system around the window is not handled properly.
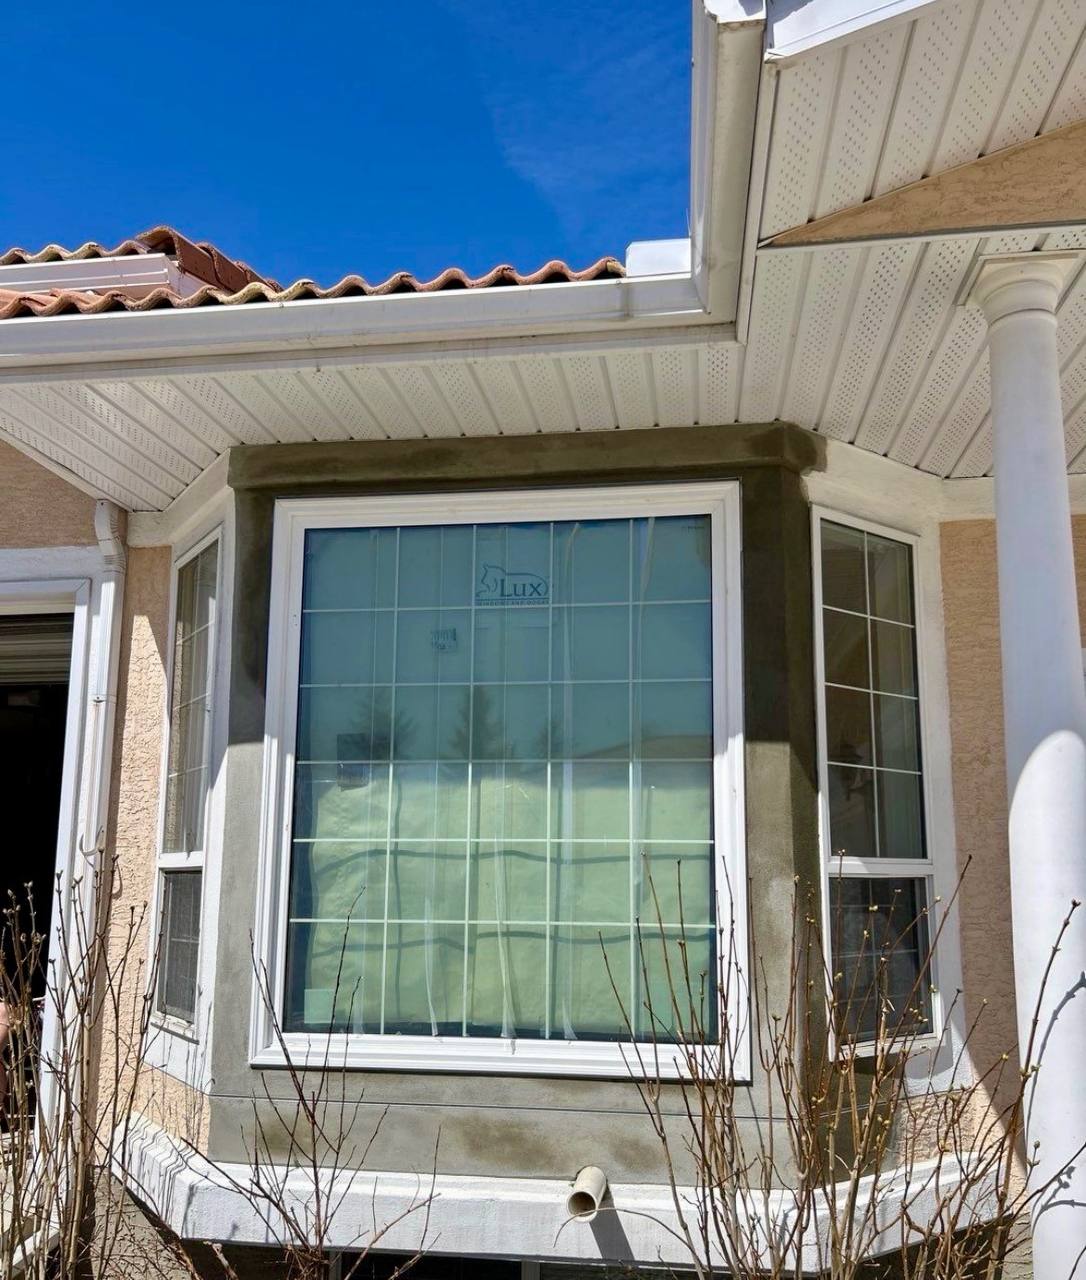
What a Proper Stucco Window Replacement Looks Like
A quality installation treats the window and the surrounding stucco as one connected exterior system. Here is what that process looks like from start to finish.
Stage 1: Inspection Before Anything Is Removed
A quality contractor starts by assessing the existing stucco condition: cracks, staining, soft areas, previous patchwork, failed caulking, and any visible signs of water entry.
Stage 2: Careful Removal
The old window should be removed in a controlled way that protects the surrounding stucco as much as possible. Aggressive cutting or careless removal damages the finish and creates more repair work.
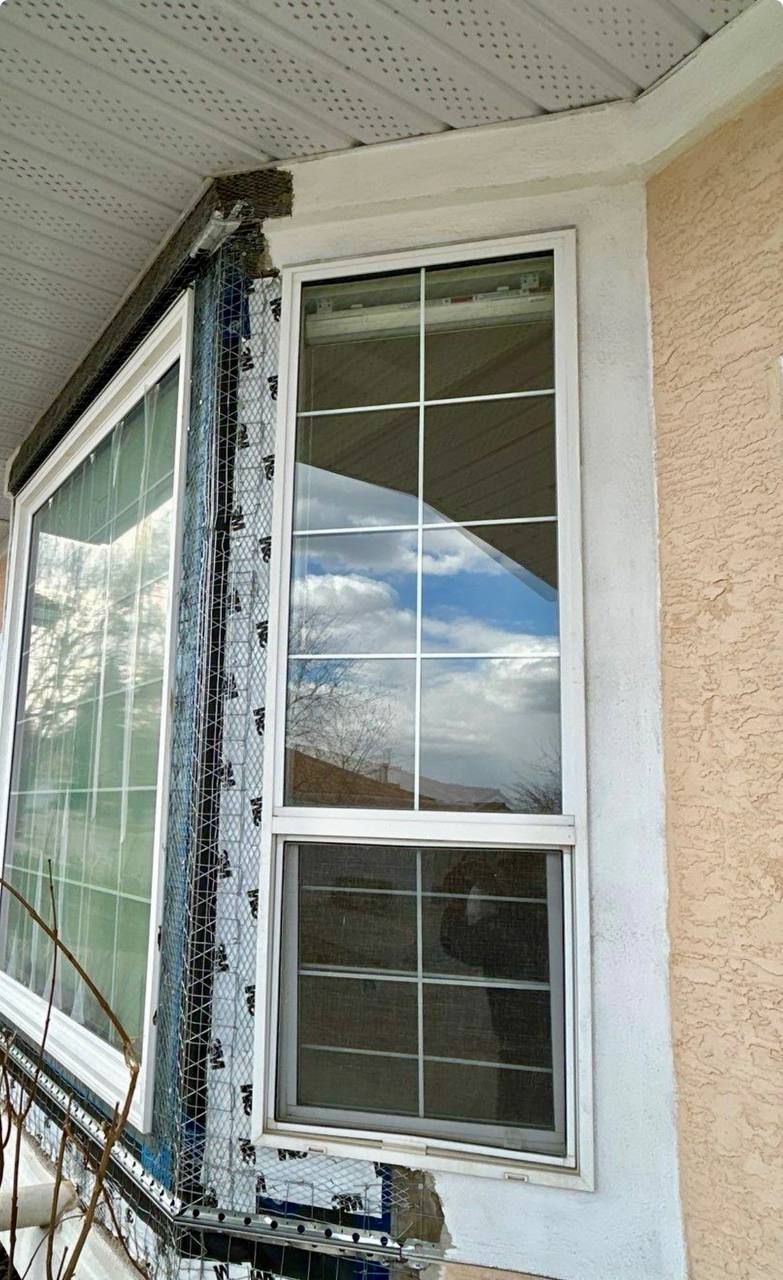
Stage 3: Inspecting the Rough Opening
Once the old window is out, the framing, substrate, and surrounding area should be examined for rot, moisture damage, mold, or material failure. This is where shortcut jobs fail. Covering up hidden problems instead of correcting them creates a future repair on a delayed timer.
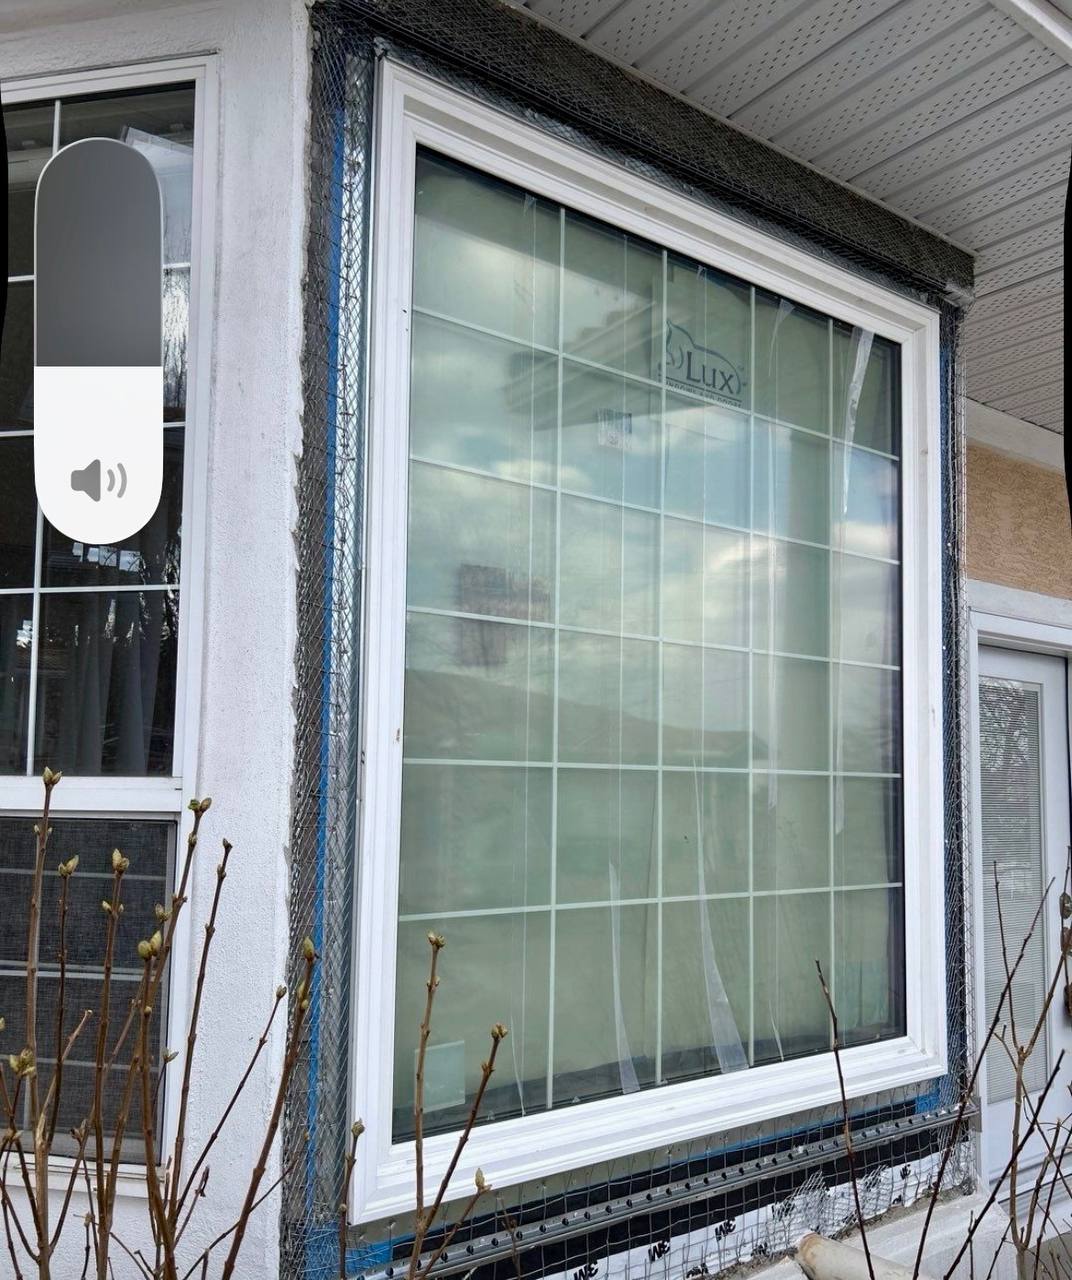
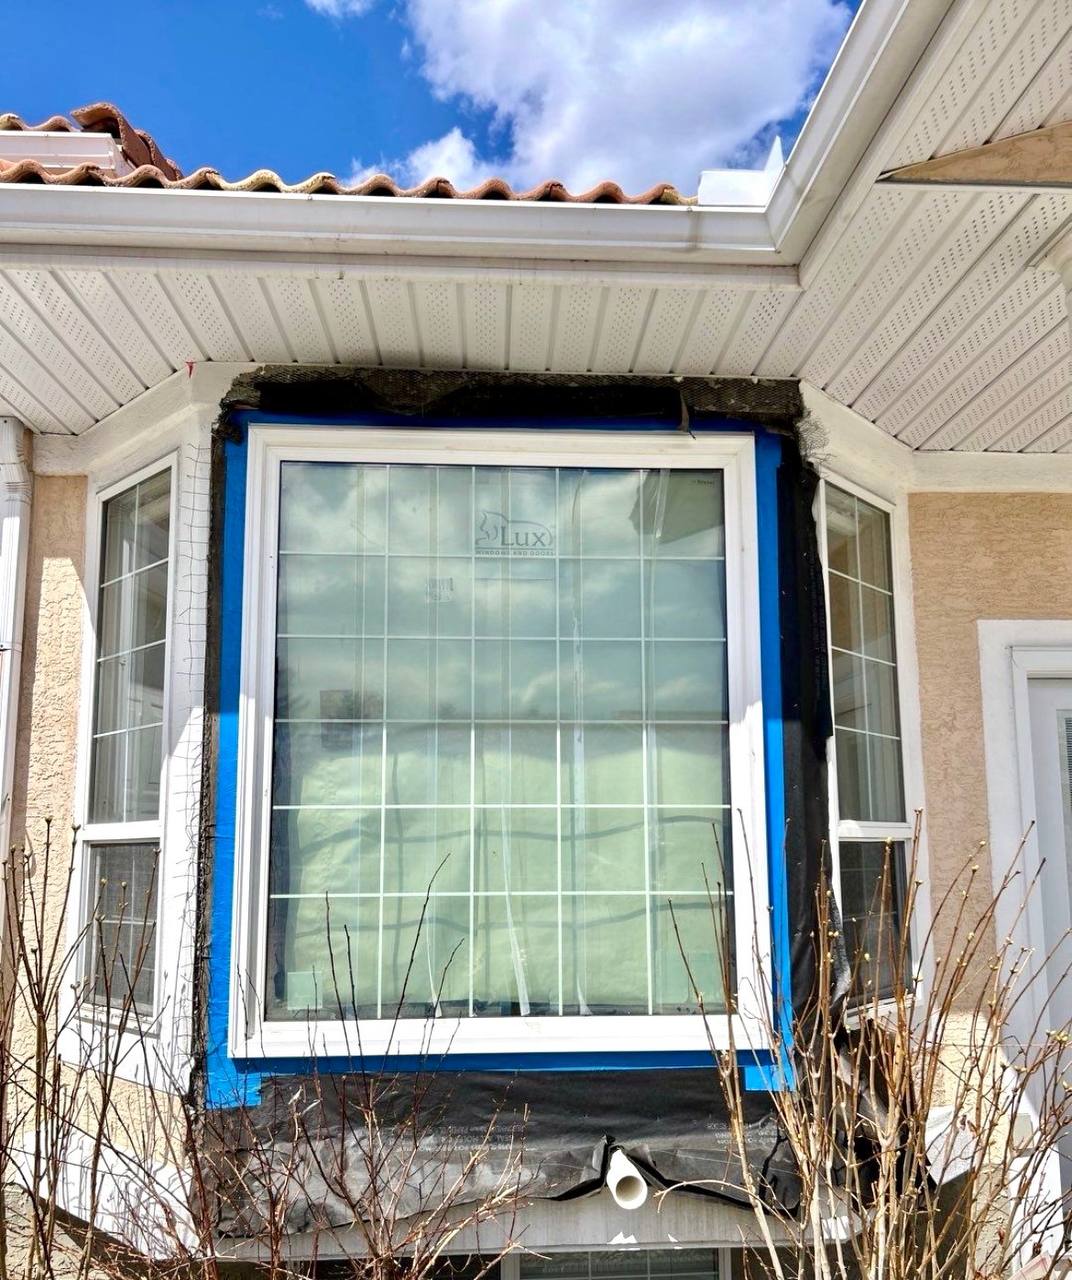
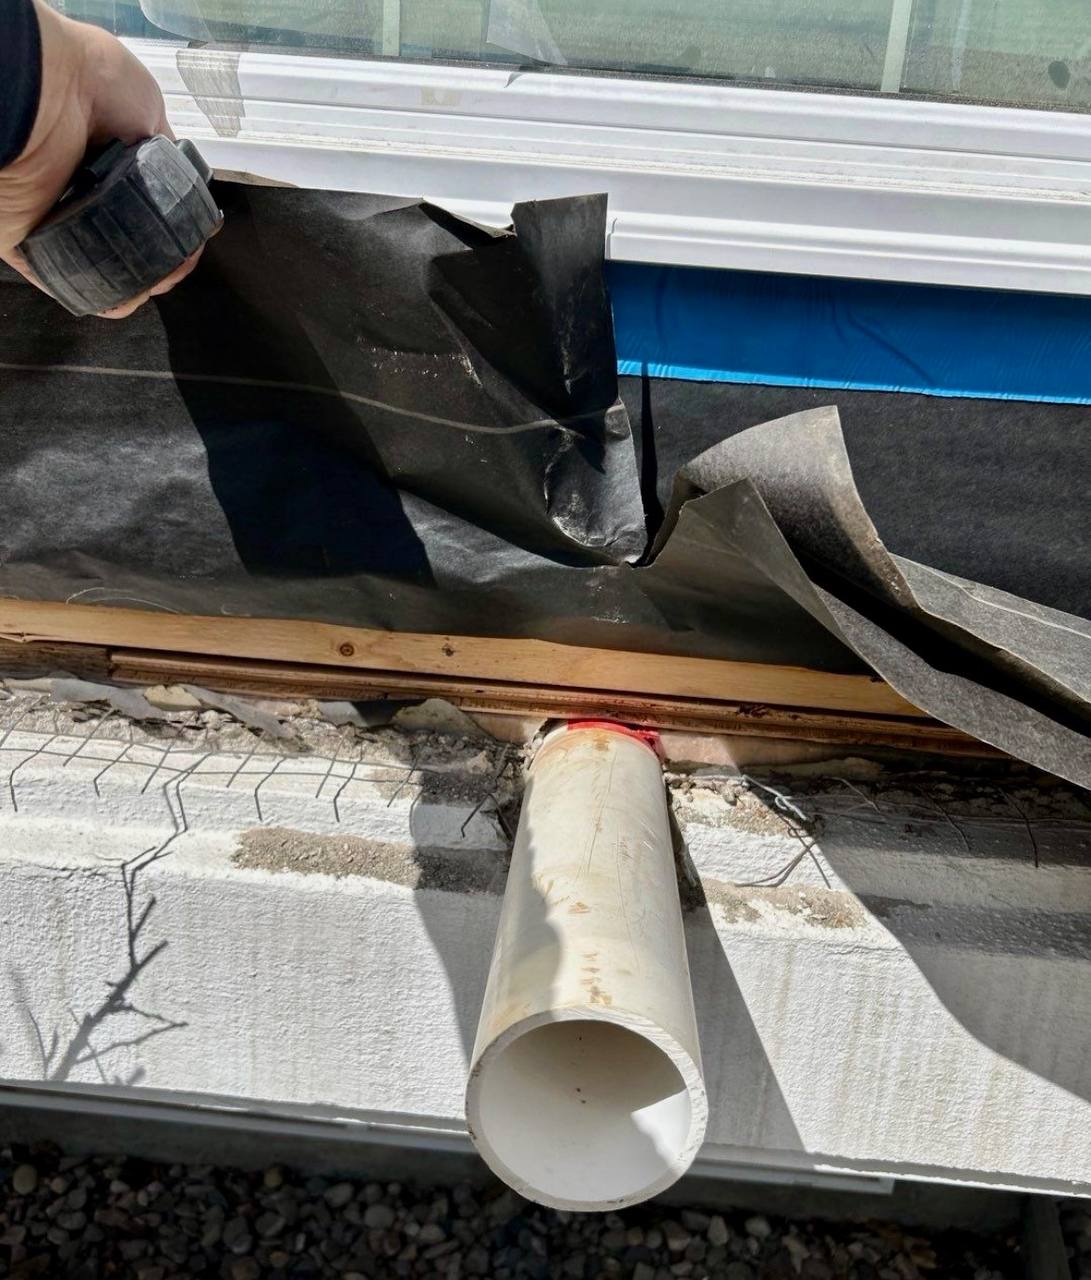
Stage 4: Proper Water Management
This is the most critical stage. The opening needs correct flashing, weather-barrier tie-in, and sealant details so water is directed away from the wall system. A layered defence — not just surface caulking — is what protects the home long-term.
Stage 5: Installing the New Window Correctly
The window must be level, square, properly fastened, insulated around the frame, and sealed using the right exterior-envelope approach. A high-quality window installed poorly will still fail.
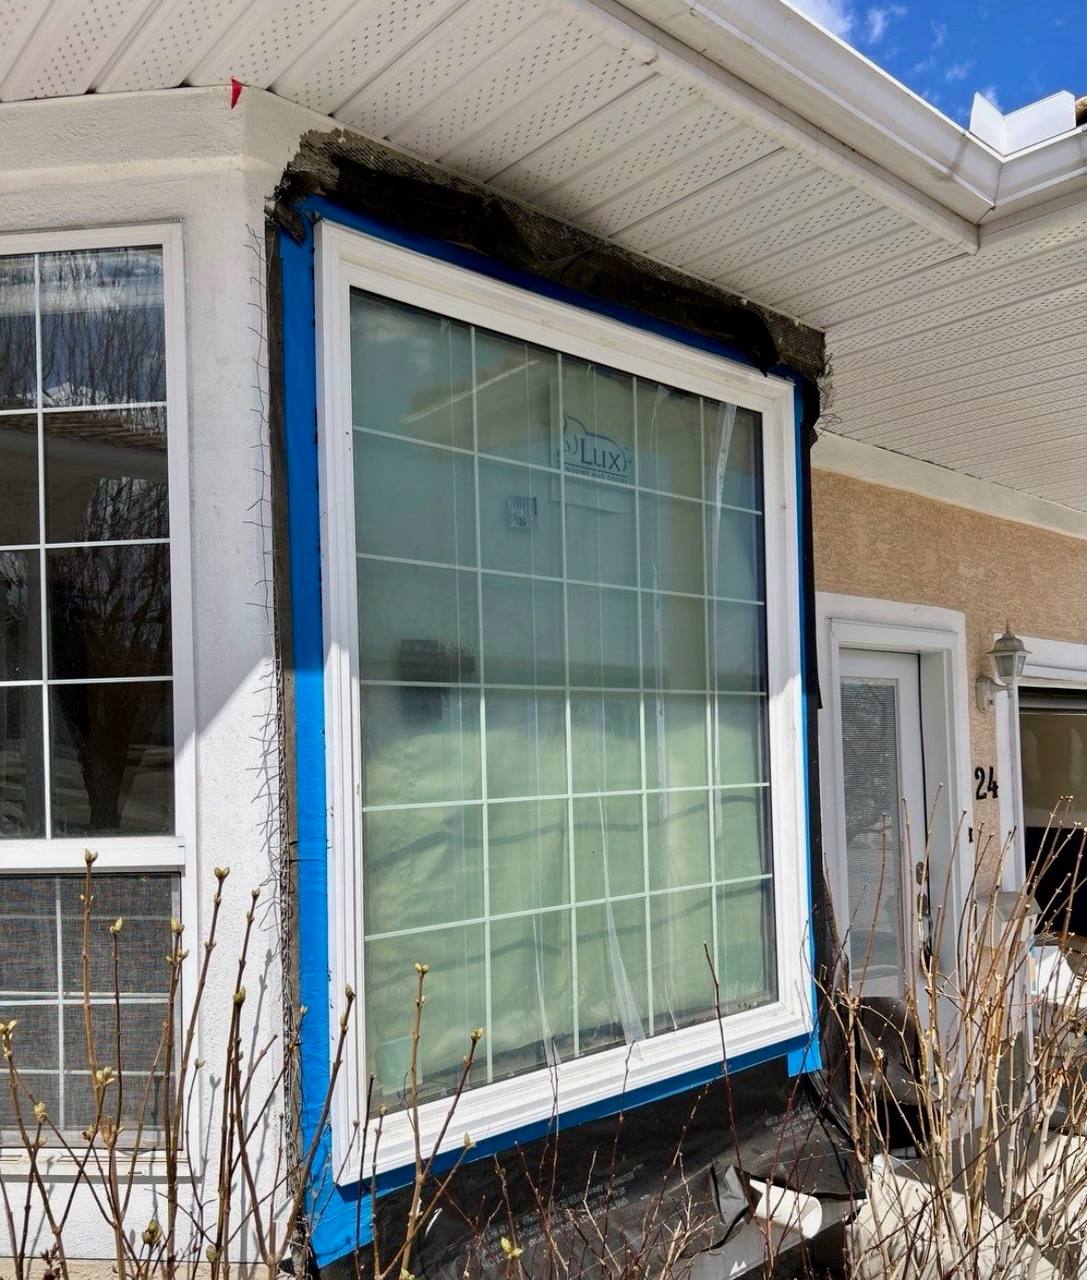
Stage 6: Repairing and Finishing the Stucco Edge
This is where stucco-specific experience matters most. The surrounding finish may need patching, texture matching, trim work, and refinishing so the window integrates cleanly with the rest of the exterior. Our Calgary stucco repair services include exactly this type of detail-focused finish work around openings, transitions, and edges.
Stage 7: Final Seal and Inspection
The completed project should be checked for proper window operation, clean seal lines, a stable stucco transition, and a finished exterior that looks consistent with the rest of the home.
The difference between a quality job and a shortcut job is simple: a quality job protects the wall system behind the stucco. A shortcut job only makes the window look replaced from the outside.
The Calgary Factor: Why Local Climate Makes This Even More Critical
Window replacement on a stucco home anywhere requires care. But in Calgary, the stakes are higher. Calgary’s weather puts significant stress on exterior materials through:
- Long, cold winters with sustained freezing temperatures
- Freeze-thaw cycling through shoulder seasons
- Warm summers that drive expansion and contraction in exterior materials
- Wind-driven snow and rain
- Strong UV exposure
The freeze-thaw cycle is particularly hard on stucco window openings. Moisture can get into small gaps, poor sealant joints, or weak stucco edges. When it freezes, it expands. Over seasons, that turns minor cracks into larger failures and opens pathways for more water.
The most important installation details for Calgary homes: proper flashing at all window edges, a clean tie-in to the weather barrier behind the stucco, flexible exterior-grade sealants that handle movement through temperature swings, careful stucco cutting and patching, drainage details so moisture isn’t trapped, and insulation around the frame to reduce drafts and condensation.
Insert-Style vs. Full-Frame Replacement: Which Is Right for Your Home?
Insert-Style Replacement
The new window is installed into the existing frame without fully removing everything around it. This can work well when the existing frame is structurally sound and dry, there are no signs of rot or water damage, and the stucco around the window is in good condition.
When it becomes the wrong choice: Insert-style replacement is a problem when used to cover existing issues. If there’s moisture damage or failed flashing, inserting a new window into the same problem area hides it rather than fixing it.
Full-Frame Replacement
The old window and frame are removed more completely, giving the contractor a better opportunity to inspect the rough opening, correct hidden damage, improve flashing, and properly rebuild the tie-in between the window and the wall. Full-frame replacement makes more sense when there are signs of leaking, staining, rot, or when the window size or configuration is changing.
The rule of thumb: Insert-style is appropriate when the opening is healthy. Full-frame is better when the opening needs to be inspected, corrected, or rebuilt.
Energy Efficiency: The Hidden Story Behind the Glass
A common assumption is that energy efficiency comes from the window itself. Those things matter — glass package, gas fill, low-E coating. But for a Calgary homeowner’s heating bills, the installation details often matter just as much.
The window saves energy. The installation protects that energy performance.
- Air sealing around the frame — If cold air can move around the frame through gaps, the home will feel drafty even with a brand-new window.
- Insulation in the cavity around the frame — The space between the new window and the rough opening needs to be insulated correctly. Under-filled insulation creates cold spots and drafts through Calgary winters.
- Moisture control — Water infiltration behind the stucco degrades insulation performance over time. Proper flashing and moisture management protect energy performance long-term.
- Interior and exterior seal continuity — The inside air seal and outside weather seal need to work as a complete system.
A high-performance window installed poorly will not perform well. Homeowners who invest in quality windows deserve an installation that lets those windows actually do their job.
Stucco Texture Matching: What to Realistically Expect
After a window replacement, the stucco around the opening needs to be repaired and finished. This step separates contractors with real stucco experience from those who treat it as an afterthought.
A quality repair focuses on three things:
- Matching the texture pattern — The repaired area should not look flat, rushed, or obviously different from the original surface.
- Blending the repair area — A shortcut job leaves a hard-edged square patch. A better repair blends outward so the transition is gradual.
- Managing colour expectations — Colour is often harder to match than texture. In some cases, painting or coating a larger section may be needed for a more uniform result.
A contractor should not promise a perfect invisible repair without seeing the home, the stucco age, the colour, and the existing texture. A realistic commitment is: clean, durable, weather-protected, and blended as closely as possible.
10 Questions to Ask Before Hiring a Contractor
When getting quotes for window replacement on a stucco home, do not just ask about window brands and price. Ask how the contractor plans to protect the wall system around the window.
- Have you replaced windows on stucco homes before? Red flag: “It’s basically the same as any other window replacement.”
- Will you cut into the stucco, or do an insert-style replacement? Red flag: “We’ll just pop the old window out and caulk the new one in.”
- How will you handle flashing and water management? Red flag: “We use good caulking.”
- What happens if you find rot or moisture damage after removing the old window? Red flag: “There won’t be any damage.”
- Is stucco repair included in the quote? Red flag: A cheap quote that makes no mention of stucco patching or finishing.
- How will you match the existing stucco texture? Red flag: “It’ll match perfectly, no problem” — before they have even seen the wall.
- What materials and sealants will you use? Red flag: The contractor cannot explain what type of flashing, sealant, or insulation products they use.
- Is the quote itemized? Red flag: A one-line quote with no detail.
- What warranty applies to the window, the installation, and the stucco repair? Red flag: The contractor only references the manufacturer’s window warranty.
- Can you show photos of previous stucco window projects? Red flag: Plenty of window photos but no examples involving stucco homes.
The biggest warning sign is a contractor who makes the job sound too simple. On a stucco home, window replacement is not just a window job — it is a window, stucco, flashing, sealing, and moisture-control job.
Should You Act Now or Wait?
If your windows are older but still dry, solid, and performing reasonably well, you can plan the project carefully. But if there are signs of water entry, cracking, or damage around the window — waiting can significantly increase the cost of the eventual repair.
Act sooner if you notice any of these:
- Cracks forming at the window corners
- Staining below or around the window
- Peeling paint or bubbling drywall inside
- Drafts around the window frame
- Condensation between glass panes
- Soft or swollen trim
- Failed or shrinking caulking
- Stucco pulling away from the window edge
- Interior moisture marks after snow, rain, or thawing conditions
In Calgary specifically, the freeze-thaw cycle makes small gaps and weak edges worse over time. Waiting one more season can cost more than homeowners expect. If you’re noticing any of the warning signs above, the right first step is an honest assessment. Our Calgary stucco repair team can walk through the exterior condition with you and tell you what the wall actually needs.
Final Thoughts
Replacing windows on a stucco home is not complicated when it is done by someone who understands the full exterior system. But it is also not a job where cutting corners pays off.
The window is one part of a layered wall assembly. The stucco, flashing, moisture barrier, insulation, and sealing all have to work together. When they do, you get a durable, weather-tight, energy-efficient opening that performs through Calgary winters for years to come. When they don’t, you get the most expensive kind of repair — the kind that was supposed to already be done.
Ready to get an honest assessment of your stucco home’s windows or exterior condition?
Request a free estimate from High End Construction — we serve Calgary, Airdrie, Chestermere, Cochrane, Okotoks, and surrounding communities.
You can also explore our full range of exterior repair and finishing services or browse our resource guide for more information on stucco, EIFS, and exterior maintenance in Alberta.
High End Construction specializes in stucco repair, EIFS correction, parging, and exterior finishing work in Calgary and the surrounding area.
Leave a Reply